
THE BIANCHI X4 DIARIES
Bianchi Celeste Paint - How to colour match your vintage celeste Bianchi
Bianchi Rekord painted with Cycle Design Celeste colour "Formula".
Speculation surrounding Bianchi celeste paint, leaves no clue of substance to the true origins of this popular Italian colour. Implausible theories include, a dreamy Milan sky, left over war paint, or perhaps a colour match for the eyes of a queen, Margherita of Savoy. If you're determined to re-paint your vintage Bianchi in it's original celeste colour, the only history of value you really need to know, is which version of Bianchi celeste was used on your bike. Followed by finding a way to reproduce an authentic rendition of this celestial Bianchi colour.
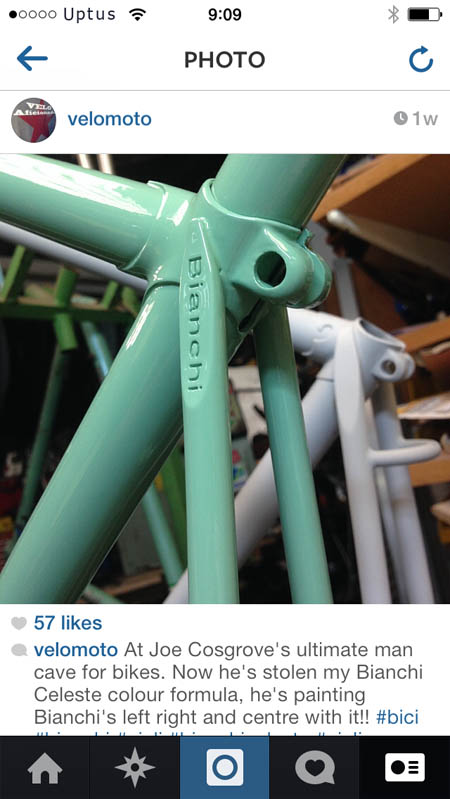
Last Week : "At Joe Cosgrove's ultimate man cave for bikes. Now he's stolen my Bianchi Celeste colour formula, he's painting Bianchi's left right and centre with it!!" When I posted a picture of a mid 1980's Bianchi on Instagram, some bike riding aficionado's hit on the idea of asking me to reveal my secret Bianchi Celeste colour "formula". The joke is partly true, before Joe painted my Bianchi X4 he always painted Bianchi's in a lighter solid celeste colour, that's a core colour in his permanent colour range. Joe had painted stacks of warranty jobs for Bianchi in Australia using his lighter celeste colour too. There's a second Bianchi colour in Joe's range, an effects colour, a clear coat - over colour base - system, for Bianchi's like the Mega Pro. That all changed when I insisted that we use a solid colour for my Bianchi X4, but much darker than Joe had ever imagined for any Bianchi. So the bike in the insta picture is the same colour as the one I'd coerced Joe into replicating. In a sense Joe did "steal" my Bianchi colour "formula", because he would never have thought to produce celeste, as dark as this before! So now Joe essentially has three different stock Bianchi colours, including my "Dark X4 Celeste".

Bianchi X4 Celeste Colour Match
Our Bianchi celeste "formula" isn't an easily repeatable formula. It took the best part of a day to eye match our colour, partly because Joe constantly tried to convince me that it was now perfect, but I kept pushing for a darker version until we got it right. Months later a mid 80's factory painted X4 showed up, and we could compare the two - bulls eye, we'd nailed it.
We began with Joe's lighter celeste that he's used for years, adding enough celeste paint into a glass measuring cylinder to spray one frame, Joe's been doing it so long he automatically adds the correct amount. You know why this paint is doled out in exact amounts when you see the price per litre! We then added one teaspoon of white, about four teaspoons of bright yellow and about thirty or forty teaspoons of black, and that was it. I know this isn't very helpful if you're trying to reproduce this yourself, but that was the only way we could get a result at the time.
For the eye match we didn't have an actual factory sample of the darker celeste, so we used a swag of photographs, original adverts, the photo of my original team bike and an old beaten up Bianchi as our muse, that retained it's factory paint job, a clear coat over colour base system, with a similar celeste hue to the one we were chasing. By the time we finished spraying test paint all over our Bianchi muse, it exhibited a new celeste colour range all of it's own.
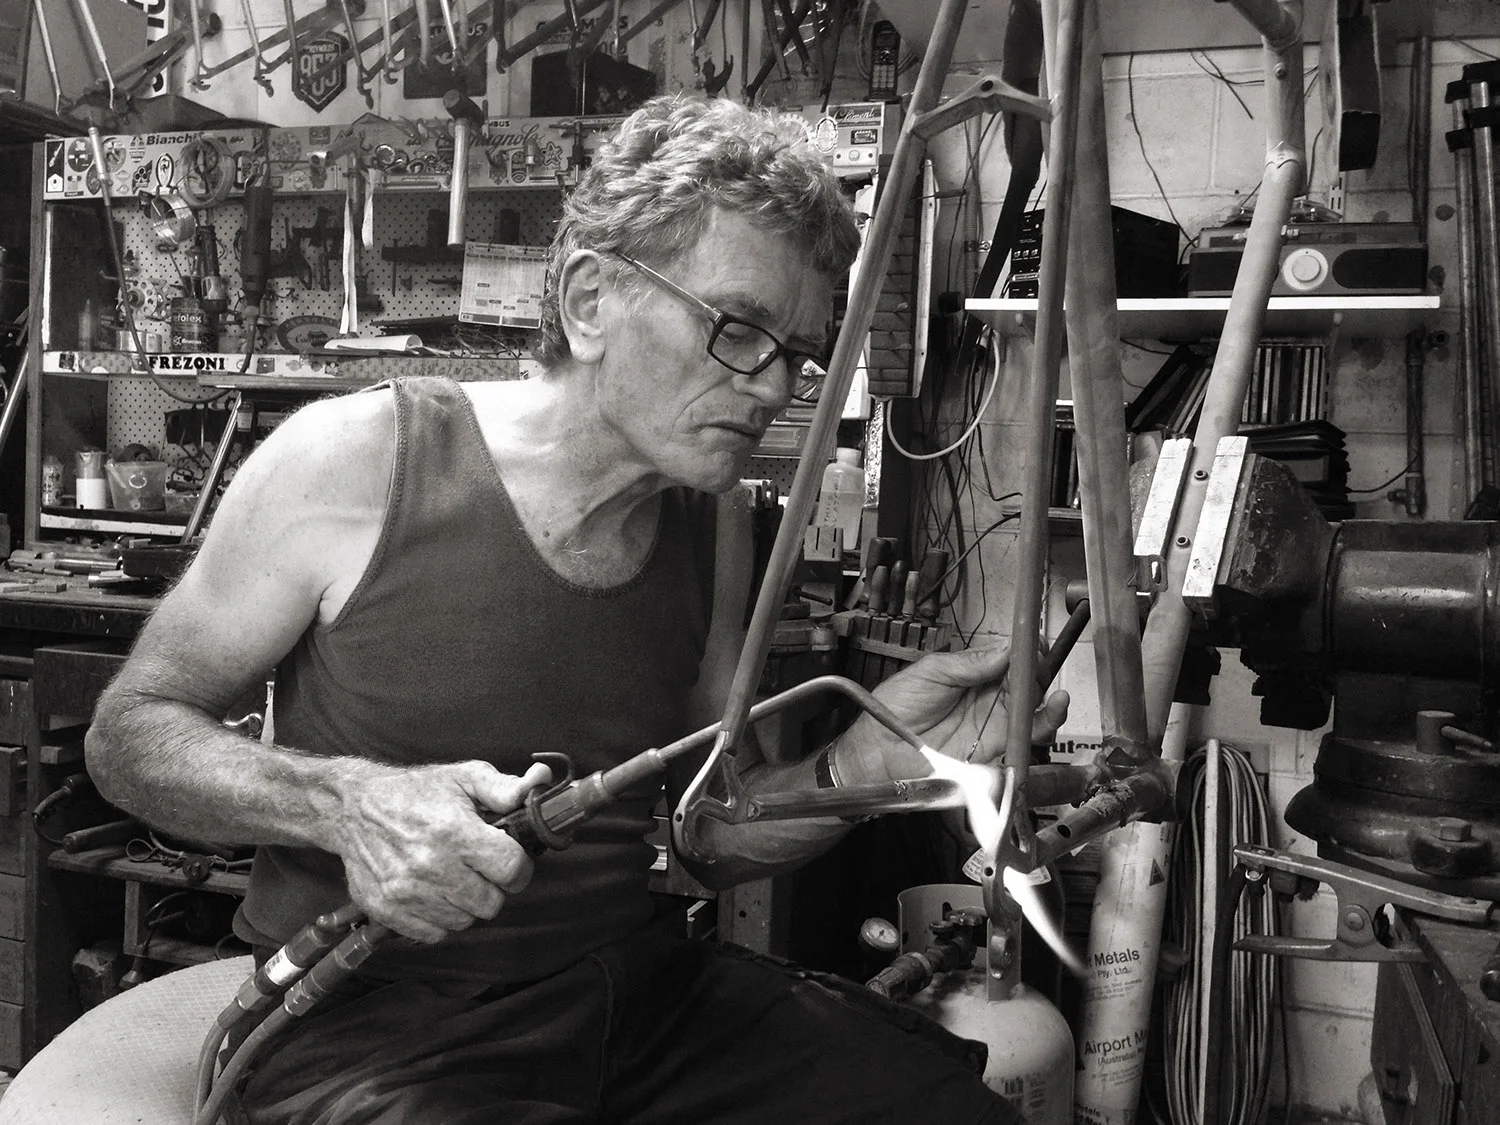
Joe won best paint in show at N.A.H.B.S a couple of years back and Darrell McCulloch from Llewellyn Custom Bicycles uses Joe's services exclusively. The detail , knowledge and skill that Joe pours into even the most basic solid colour paint job is astounding! I could never have got near the result that we managed together without Joe's expert help, just watching him spray paint onto old steel, you know the man has done his 10,000 hours and then some. To boot, I wouldn't dare pretend to know the first thing about pro painting techniques, that part is best left to the professional frame painters. Whatever I repeat here, is just my version of finding the mythical celeste "formula" and may help you more accurately find your own version of celeste for your Bianchi.

Bianchi Celeste Variations from custom colours to RAL 6027 for a stock colour reference, through to clear over base colours on the Mega Pro.
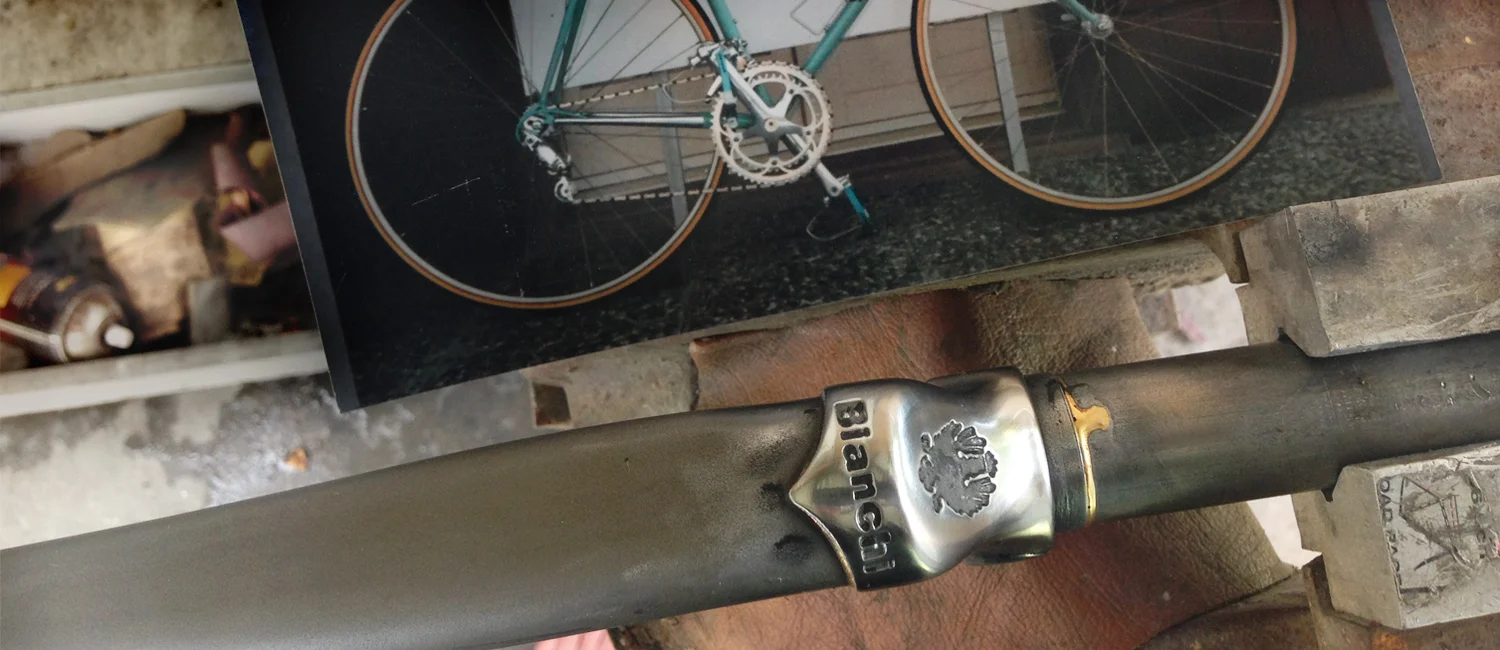
By the 1980's Bianchi's, were painted in a number of colours, not only celeste. The Bianchi I'd posted on Instagram, is probably from the mid 1980's Bianchi Rekord range, it's original factory paint was silver.
The 2. January 1986 Bianchi catalogue reveals this about factory options for 1980s' Bianchi colours.
Bianchi Specialissima X4 Colour : Celeste Bianchi
Bianchi Specialissima SL Colour : Celeste Bianchi
Bianchi Specialissima GIRO Colour : Celeste Bianchi, pearl white
Bianchi REKORD 915 VICTORY Colour : Celeste Bianchi, blue
Bianchi REKORD 910 S.I.S Colour : Transparent Red, white
Bianchi REKORD 900 Colour : Celeste Bianchi, red
Bianchi REKORD 845 Colour : Metallic blue, metallic silver, anthracite
Bianchi REKORD 841 Special Colour : Transparent Red, anthracite
Bianchi REKORD 841 Colour : Celeste Bianchi, red

Bianchi 1986 colour range for the Rekord models. The very light version of celeste appears on the forks of a Rekord 920.
Solid Colour or Effects Colour -Two Different Paint Systems
Before the 1980's, Bianchi's were painted mostly in solid colours. Then times changed and Bianchi started painting frames in something similar to a clear coat over colour base system. The Mega Pro is a classic example. The colour system used on a Bianchi Mega Pro and the colour match for it's version of celeste, is entirely different to the vintage, solid colours. The solid and effect colours may look similar as a colour, but each colour "formula" is very different, as Joe and myself found out. For these effects colours Joe uses the House of Colour paint range which allows for effects like, Candy, Pearl, Metal Flake and Fluoro. For solid two pack polyurethane colours, Joe uses paints from Spies Hecker.
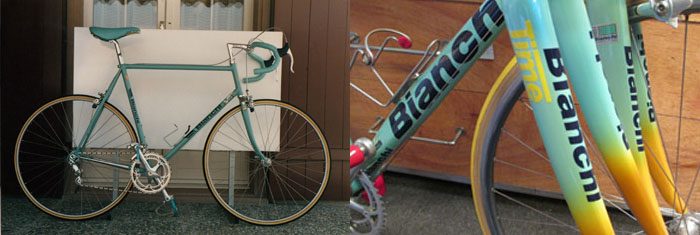
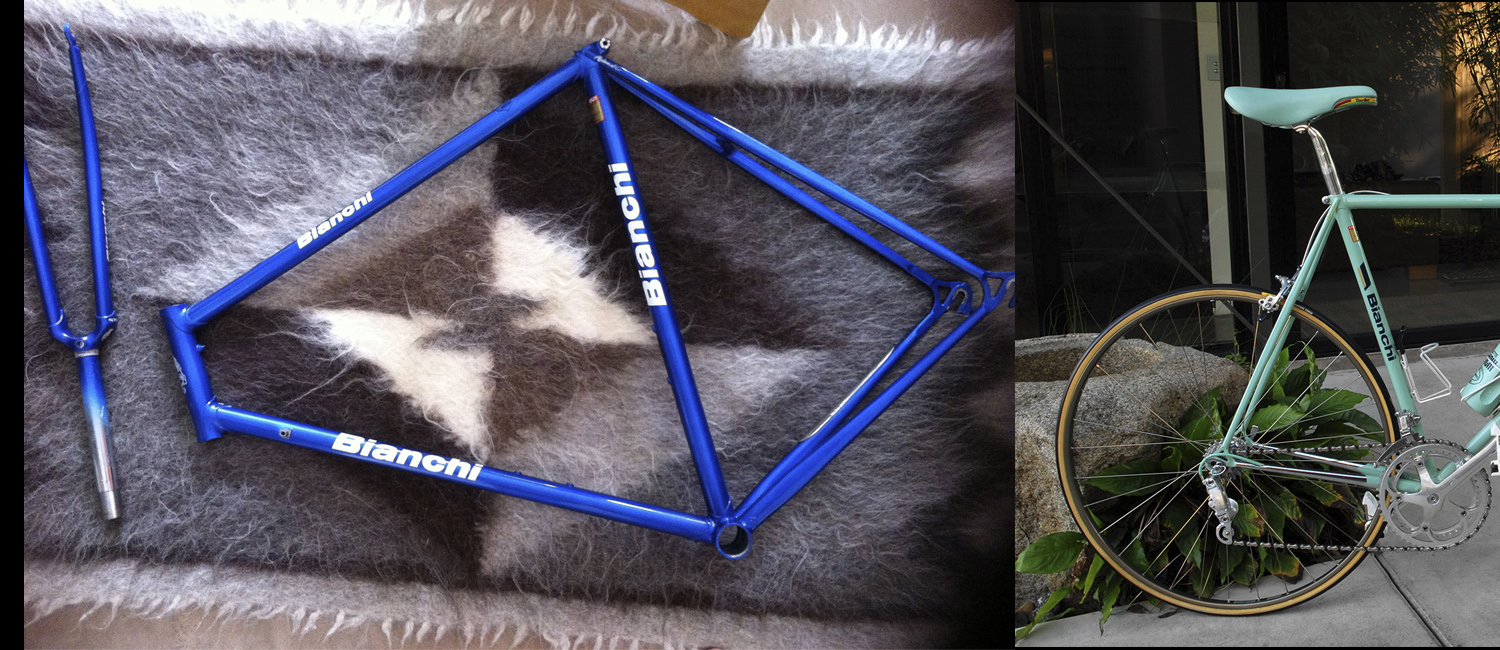
The 1987 solid colour on the Bianchi X4, completely different to the Mega Pro Bianchi of the 1990's which had a clear coat over base system.
The solid colour paint system on the Bianchi X4 is a different paint system to the clear over base system used on the Mega Pro. I've used these two examples to illustrate just how difficult it would be to detail an exact, celeste paint "formula" for Bianchi bicycles across many decades of evolving paint systems. So where do we begin with selecting the correct colour. Some intrepid journeymen attempt to give an easy answer by listing colours such as Pantone #332 or you could try RAL 6027, which looks on screen to closely resemble our X4 colour. It's problematic to suggest one easy answer using a colour chart number, especially when there are so many variants. On RAL 6027 though, some bike restorers have tried that one and they reckon it's damn close, there are so many variants, it begs the question .... what is Bianchi celeste anyway? This sums it up "I wouldn't worry too much about exact matches. I've seen enough variations on 'Celeste' to fill a shade card!" So if you're not up for any extra messing about, RAL 6027 looks like a good bet!
Some methods to consider.
Step 1. Determine which celeste colour is right for your bike.
Determine which Bianchi celeste colour you are trying to replicate that matches your intended outcome. You may need to do some thorough research into the era of your exact Bianchi. Use photographs, catalogues, frame samples, paint samples anything you can lay your hands on! The X4 colour of 1987 which we attempted to emulate, was much darker than we had originally perceived.
Step 2. Which colour system, solid colours or clear over base effect colours.
Step 3. Get an accurate colour match.
Once you're satisfied that you know which celeste colour your Bianchi should be painted in, and which paint system. See if you can find a sample to colour match. Your frame painting company should be able to replicate that by taking the sample to their paint supplier.
Some options.
Find a frame painter who knows this colour and can do it in their sleep. Job done. You still might need to research your specific celeste colour.
Find an old Bianchi with factory paint the same as yours and colour match that.
If you are re-painting and the original paint is intact, get a colour match of your original celeste before you strip it off your frame.
Get a factory colour touch up sample that matches your Bianchi, if it matches your actual project go for it
Use our long winded method, find period correct photos, do a mile of research and go for broke...
Take a look at the image below. Doing your research is important. If I'd just sent my bike to Joe and not researched the colour, it would have come back with the lighter version, completely different to the one my team bike was painted with! The usual warning about colour applies. Different monitors, varying printed processes, varying light conditions when viewing prints or paint samples of celeste colours, bright sun, darkened rooms, tungsten light, there's a multitude of factors that will affect how you see colour. Joe has had decades of assessing paint colours and I've had a similar amount of time colour correcting photographic images. To get the celeste colour we wanted, took all of our combined skills to achieve our goal.

You'll need to asses the vintage of your Bianchi and make the correct celeste colour choice for that era
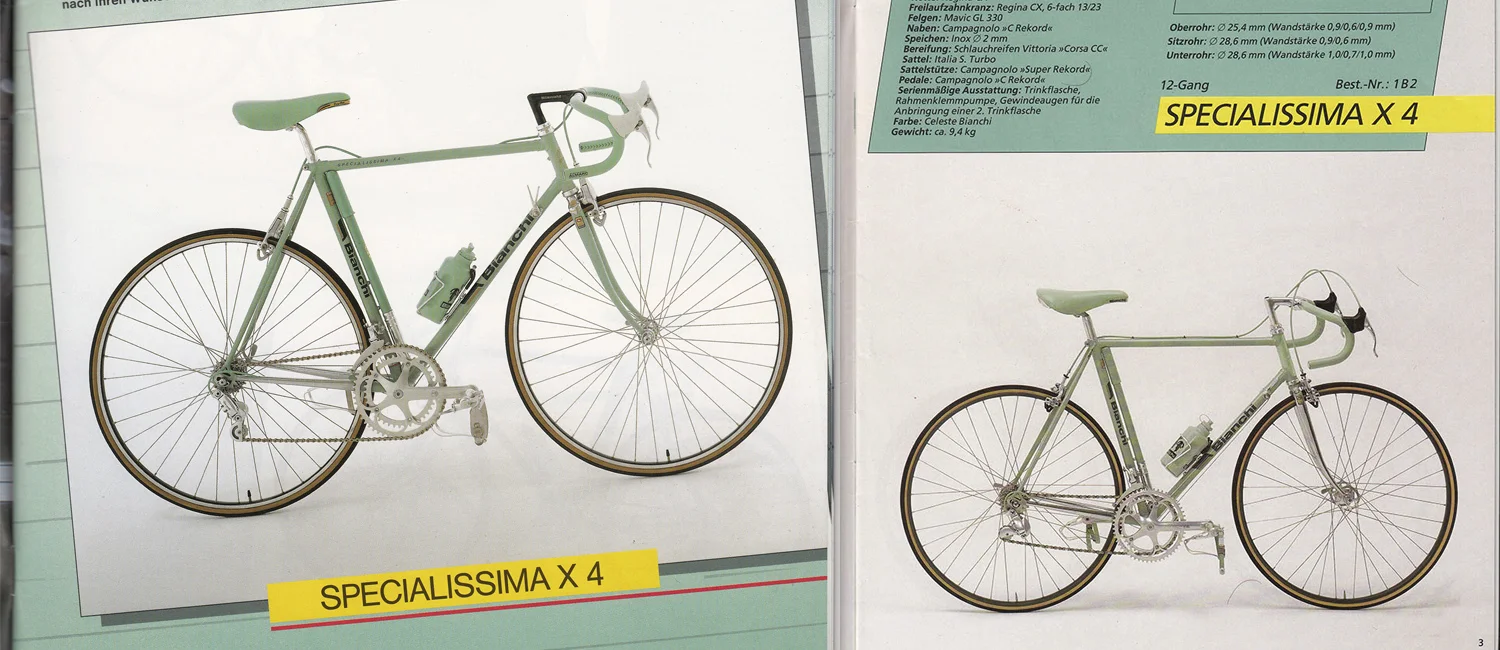
An X4 to throw you off the trail!
Don't be thrown off the trail and think that any old celeste will do! The Bianchi X4 below looks more like a sage green than celeste, with an even lighter coloured head tube. This could be partly due to the colour of the image too. It's from a German catalogue from the first months of 1986. You can see this X4 doesn't have any world champ decals or Super Turbo Campione del Mondo saddle. So pre dates Argentin's win at Colorado later that year. First gen corsa record Campagnolo and a super record seat post, this bike even has high flange hubs, which were fitted to Centenario's, usually not seen on X4's. So it's almost the first one off the production line. This Bianchi X4 even has an internal fork crown like the Speed Bicycles example.

Take a look at the head tube on this one. Its's a two tone Celeste paint job on a factory example of one of the first ever Bianchi X4's.

A 1980's Bianchi advert, a picture of my old Bianchi X4 that we were colour matching to and Joes light celeste light base colour sample that we started from plus the effects colour sample for Mega Pro Bianchi's.
2. We prepped up an old 1990's Bianchi that Joe had laying about and we could use as a muse for our increasingly darker versions of celeste. First Joe masked off and sprayed an area with the same undercoat system, so that the final colour would be over the correct base. That way not affecting our visual colour match with a false outcome when we got to the real frame.

Masked off area on the Bianchi muse, where we sprayed our celeste colour samples.
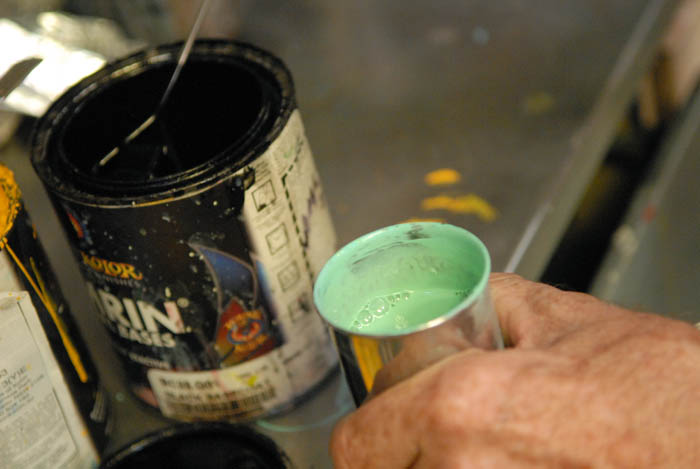
3. Using Joe's stock Celeste solid colour, we attempted to establish which colours to add to make our new, darker and "Dirtier" celeste colour. Joe knew that adding a deep yellow tint would shift it towards the depth of the clear over base Mega Pro colour, because it always works in that paint system. So we added some yellow and there was a shift in the right direction. We also tried white, only because Joe had that written on the front of his stock celeste paint tin! That didn't work so we abandoned that idea.

Here you can see the Spies Hecker stock celeste with Joe's notes on the tin to add more white. Using glass beakers to mix the colour and rudimentary tools, like tooth picks and a tablespoon.
4. We used a magnetic strip to paint our colour sample onto, which Joe would use as a visual reference for future batches of our secret Bianchi celeste colour formula.

Secret Bianchi celeste visual reference guide.
5. Once we'd established that we needed to just add black until the celeste would take no more, we went for broke and added in about thirty or forty teaspoons, it took all day, as it was just one small step at a time. Test, wait for it dry then do it all again.
Adding black to Bianchi celeste to darken it down for our 1987 Bianchi X4 colour.
6. Here's a video of Joe spraying one of many coats onto the test rig. Joe tried all day to convince me that it was dark enough, I just had to dig my heals in and keep badgering him until we nailed it! You can plainly see that here, the colour didn't even look like the colour on our factory coloured test bike, which was close to what we were aiming at.
7. Once we'd finished spraying celeste paint all over Joe's workshop and agreed that we had an exact match there were a few more steps before we could get the paint onto the frame.

Bianchi celeste, the final colour outcome.
8. Joe gave the base coats a final prep so that he could then apply an adhesion promoting sealer coat. This has to be done just prior to the colour coat and left to dry for about an hour before we could finish the job.

Base primer coats before application of adhesion promoting sealer coat.
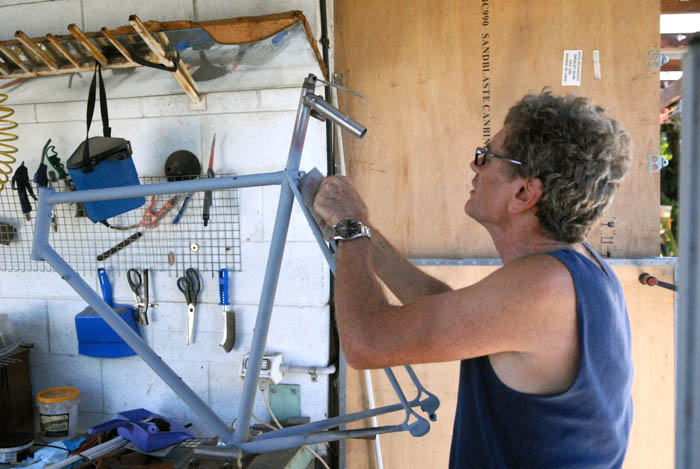
Prepping the base primer coats before the adhesion promoting primer is sprayed on.

Adhesion promoting sealer coat paint.

Sealer coat left to dry for the correct period, next the application of our custom Bianchi X4 celeste.
9. Finally, our custom celeste Bianchi X4 paint brew is mixed and the X4 goes into the paint booth for it's celeste colour coat. Four minutes later, job done. There's some serious moves built into Joe's paint manoeuvres, the way he weaves his way around that old steel. Look at how the celeste paint in the spray gun is compared to how it comes out under the bright lights in Joe's paint booth, you'd swear they were completely different colours, but the bright light source and wet paint leave no clue as to our true celeste.
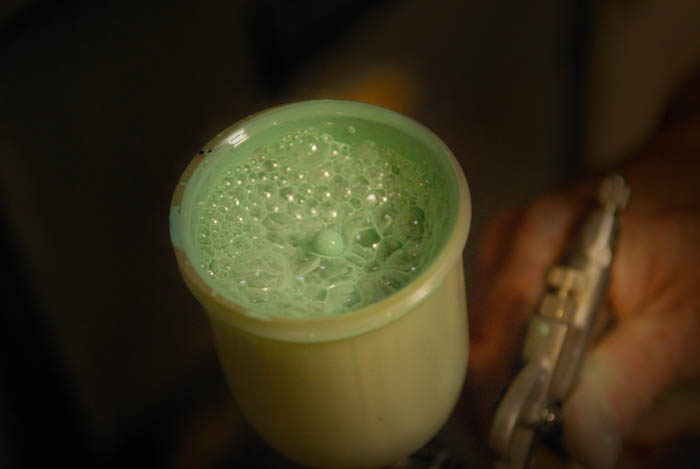
Final mix of Bianchi celeste paint ready to spray our X4.
There you have it, the Cycle Design - Velo Aficionado, Celeste Bianchi colour method, it's a long and arduous one, but got a great result. Next up in the Bianchi X4 diaries, how it took way too long to develop a "Bianchi reparto corse" decal , including the finishing touches to get this X4 looking exactly like my old bike.
RELATED BIANCHI BIKE STORIES


The story of an almost new 1988 Bianchi x4, ridden only a few km's. Winner of Road Bike Of The Year at Pushies Galore 2015.