The Bianchi X4 Diaries
Triple Chrome Plating - How to restore the chrome plating on your vintage bicycle.
What this post covers. Notes on how to prepare a bicycle frame that has previously been chrome plated or any other type of plating, i:e copper, to be re-plated. When the job requires removal of all the original plating, before the job can begin. This assumes that the original plating is that far gone that it actually requires replacement, not just preserving.
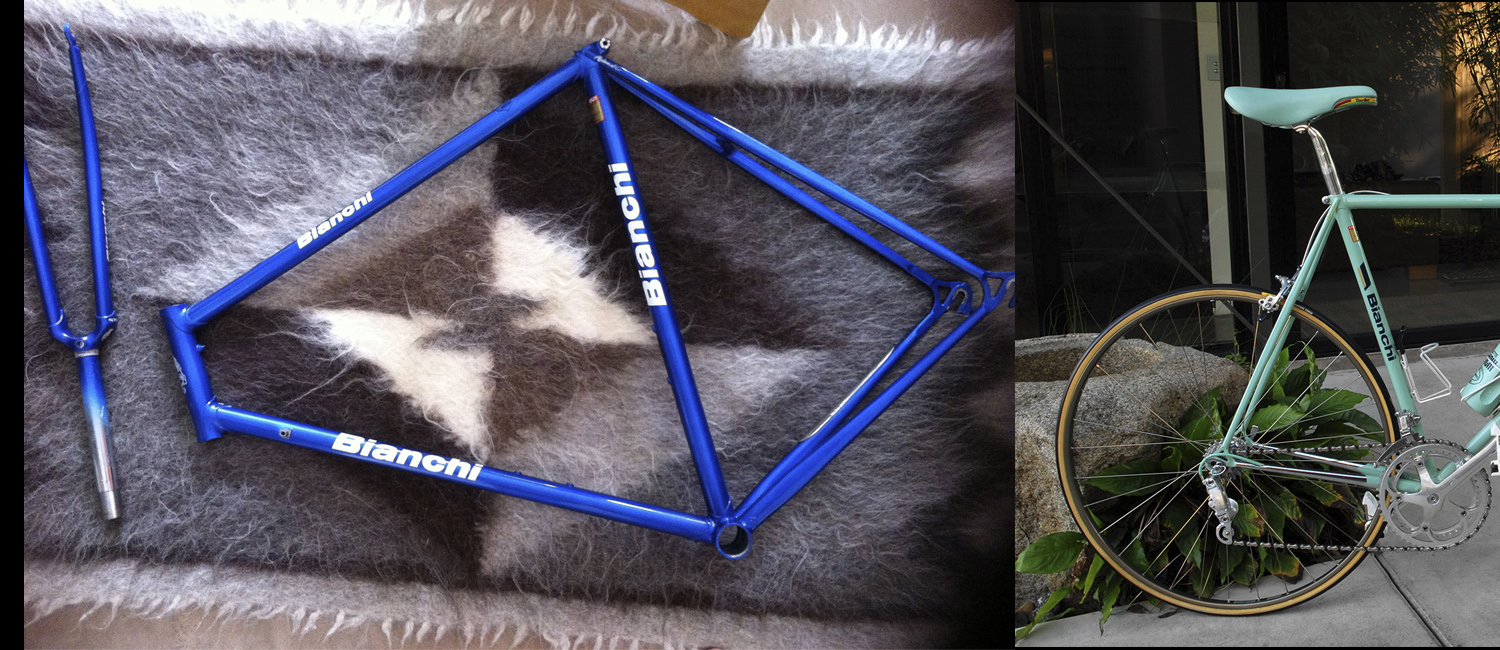
I've been restoring an old Bianchi Specialissima X4 bike to look just like a team bike I'd once raced on. It's taken almost eighteen months of unearthing old school techniques for bicycle restoration, metal polishing being the most arduous process, closely followed by sourcing all those Campagnolo and other Italian bicycle parts. In the last instalment of these Bianchi X4 Diaries - When The New Dog Digs Up The Old Dog PART 2, I outlined difficulties in obtaining a newly plated chrome finish. Since then numerous Velo Aficionado's have written in and requested a more in depth explanation of how to polish a bicycle frame, ready for electro plating.
Triple Chrome Plating is a complex job, best left to the experts. If you just want to know the process that your bicycle frame painter, or chosen electro plating firm will carry out, these notes should help clarify the details. Alternatively you may wish to perform some of the work yourself, in this case you should do your research carefully before beginning, and even that might not be enough.
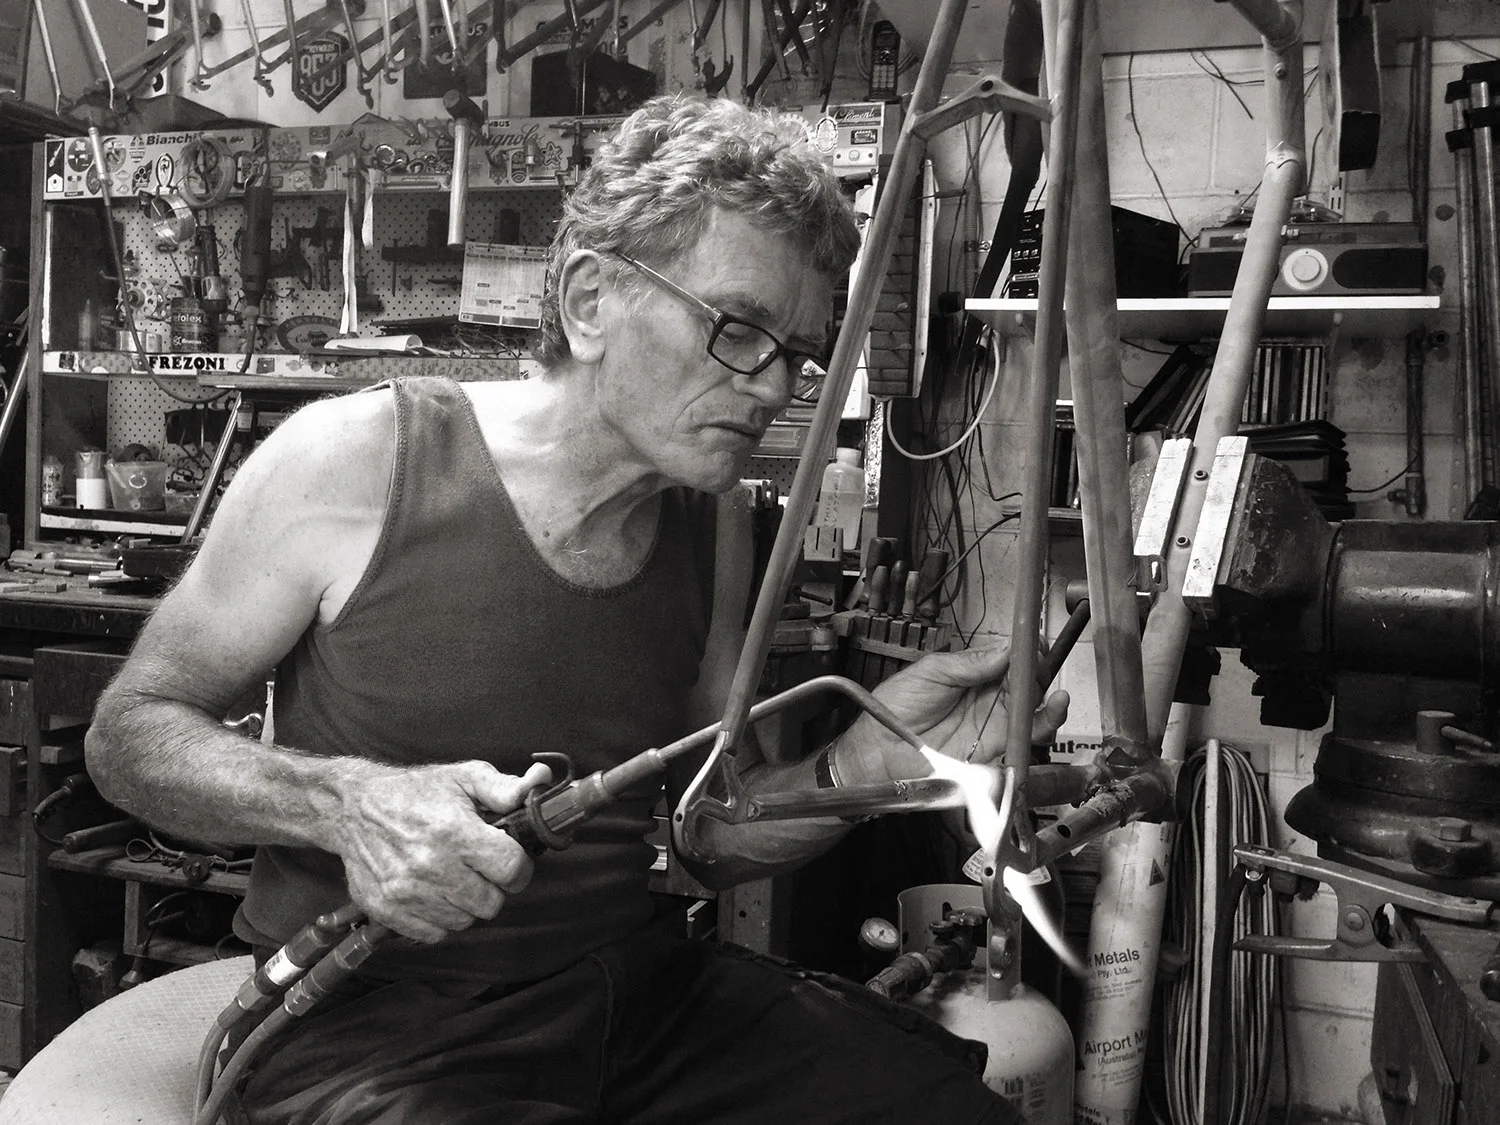
The expert frame painter himself, Joe Cosgrove showed me his metal polishing techniques learnt from many years restoring old bicycles. These notes are the basis of my own experience when I completed 99 percent of the metal polishing required to get the Bianchi X4 ready for chrome plating. I'm not an expert but with Joe's ever persistent tuition and the run of Joe's bicycle frame painting workshop, I might stand a chance of passing on at least a basic concept to get you started.
So I'll make this clear from the beginning. I am not an expert, the notes provided here form the basis of my own experience and I can't guarantee results if you undertake your own re-plating project. Your results will depend on your tenacity, energy for the project, aptitude for the tedious work ahead, access to the correct equipment, ability to accept that it can go wrong and the amount of knowledge you've armed yourself with before you begin! That said if you're still keen I hope you'll find this useful, even if it helps you make up your mind to take the job to a pro.
A basic outline is this from a previous post about Joe's own replica that he built of a, MASI built Faema bike that Merckx raced on in 1968.
While restoring customers bikes, Joe will de-chrome then re-chrome using an involved plating process including polishing. The steps are preparation of the parent metal which is polished to perfection, then copper plating, next polish the copper plating, followed by nickel plating, then chromium plating.
BASIC STEPS IN TRIPLE CHROME PLATING A BICYCLE FRAME
1. Strip all painted surfaces.
2. Remove any previous plating.
3. Block polish the job using wet and dry paper.
4. Buff polish the job using buffing wheels and buffing compound.
5. Copper plate (cyanide copper, acid copper) the part then polish.
6. Nickel plate the part, which provides corrosion resistance.
7. Colour the nickel with chrome to finish the job.
8. Care of the finished chrome, do not wax or scratch. You cannot buff out scratches in chrome.
There are many steps in the actual plating process which include meticulously and repeatedly cleaning and polishing the work.
STEP 1. Find an electro plating firm in your area and make sure they are happy to work on vintage bicycles. The process of triple chrome plating for a decorative application like a vintage bicycle will obviously require a different outcome to say a heavy duty marine application. For example plating can be completed to varying thicknesses, thin veil coats to thickly coated deposits, making the right decision here must meet the needs of your restoration project. As an example, for vintage bicycles you certainly won't want to cover up fine details with overly thick deposits of plating, say on a fork crown like the Bianchi X4.
Your local electro plating firm should be able to complete the entire job for you including the polishing. In that case you would still need to work closely with the platers to make certain that your job is carried out correctly, for example that all of the parts of the frame that are to be plated are actually dipped into the tank and treated and none missed. It's small details like this that can be lost in translation. When we had the original chrome plating removed from our Bianchi X4, the platers forgot our instruction to dip the front derailleur braze on. We had to take it back for a second go, which resulted in untold extra problems and hours of extra work.
Some frame painters like Joe, prefer not to have the parts which will be painted, chrome plated, this has to do with "keying" in the paint finish. My original 1987 Bianchi X4 team bike was completely chrome plated, with the celeste colour applied over the chrome. You could see the chrome under the paint, wherever it was scratched when the bike went on and off the roof of team cars.
Note : I followed Joe's method where he prefers to do the initial prep work himself. Stripping the paint. Taking the frame to the plater for removal of previous plated deposits. Then polishing before leaving the rest to the plater's. If I was to do this again, I'd prefer to leave the job to the professionals.
STEP 2. Remove all traces of the original plating back to the parent metal. When we restored the chrome plated finish on the Bianchi we first chemically stripped the paint from the frame. In another life our frame had been bead blasted which removed most of the original plating. There were traces of the original plating still left intact, this plating had to be removed by our local electro plating firm before we could begin polishing the frame and forks. You can't skip this step, if you leave any of the residual original plating this can cause the new plating which will be deposited over the top, to potentially lift off some time after you've spent all your money and time on polishing and painting your expensive vintage bicycle. Basically your frame will be dipped into a tank containing a weak solution of water and muriatic acid to remove old chrome deposits, or a similar process depending on what type of plating is being removed. Check with your electro plating firm first to clarify their preferences as each chrome restoration job will have it's own set of circumstances.
STEP 3. Polishing. Depending on how far gone the surface is you might first need to fill any pitted areas with a fill material like bronze brazing, this would be in an extreme case. Alternatively your plating firm can use a technique like repeatedly plating a surface with copper or nickel, then repeating the buffing and polishing each time the part is plated. Each time achieving a level surface, checking for pitting, and assessing whether or not to repeat the process. A brush plating wand can also be used to fill damaged areas by manually “stroking” the affected area with either copper or nickel. Better if you do not have to rely on these processes. If in doubt, consult with your electro plating firm and work out the best strategy for your project, before you begin work on the job.
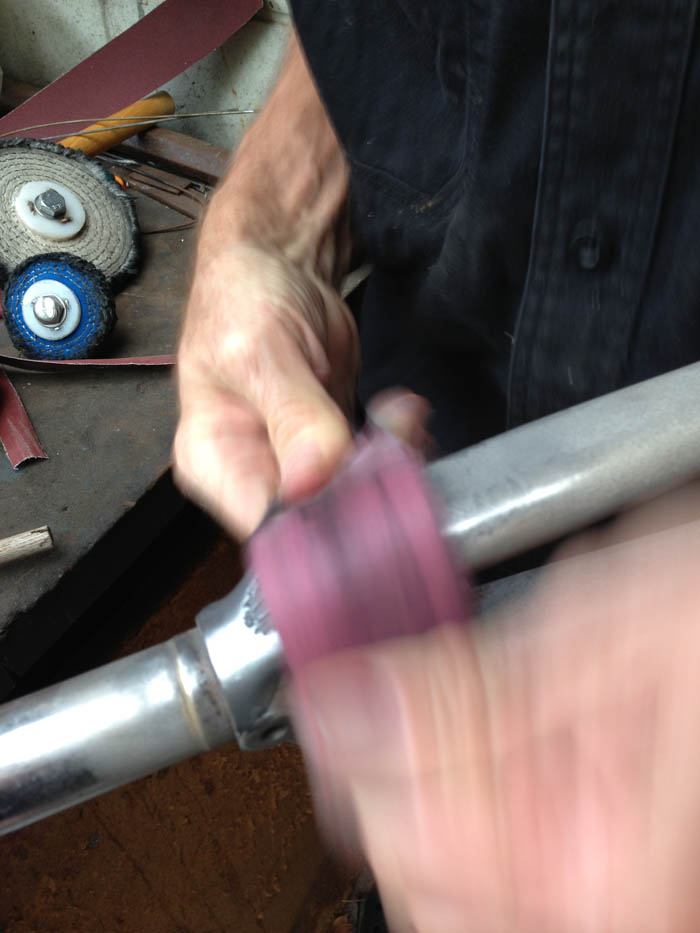
Beginning hand polishing with a coarse grit paper. You can see the cloth buffing wheels on the bench, which will be used later once the hand polishing is complete.
In most cases the parent metal will be in sound condition anyway. If you opted for Joe's extreme remedy of filling with bronze, carefully start with a file, removing the bronze or other fill materials back to a level surface.
Make sure you don't affect the original profile of the tube, fork crown, or lug at any stage of the polishing process. It's easy to get carried away and before you know it, you will have changed the original factory detail of say a fork crown profile. This is irreversible. For example on the Bianchi X4 the investment cast fork crown has subtle edge profiles which need to be retained.
Begin "block" polishing first with say 80, 120, 800 and then 1,200 even up to 1,400 wet and dry paper, I stopped at 1,200 and that got the job done perfectly. You can use just about anything that fits the profile of the frame part that you are working on, as a "block" backing to your wet and dry paper. We used hard dowels to fit the rounded shape of the fork crown, and small pieces of plywood and softer rubber or sponge blocks of varying hardness. The shape and density of the block will affect how fast and what shape the cutting profile will achieve. The harder the block the more quickly the grit will cut the metal. Softer sponge like blocks will follow the curves of a metal profile, again be careful here not to round off edges that should stay square. You'll need to experiment here, or practice on an old frame first!
You can use the paper wet or dry, I found that especially at the end stages, using the paper wet helped achieve a smooth mirror like finish. You can take the polishing as far as you think is a reasonable amount of time to achieve a desired finish. Surface preparation will affect the final result. If you deliver a mirror finish to your electro plating firm, the end result will show better than a surface that retains scratches and blemishes. The more blemishes left in the parent metal will reflect in a lower quality job. You may have spent a few hours with 12,000 wet and dry then buffed the surface to a mirror finish, yet on close inspection the surface will show small imperfections. You will need to to be the judge as to whether you continue polishing or not.
Remember that the copper plating provides a fill material to mask some scratching, so you've got to be the judge just how much you polish. This is where the experience of a pro electro plating firm comes into play. So again it's your call if you want to undertake any of this work, that's even if you can find an electro plating firm that will allow you to do any of the work yourself at all!
STEP 4. Buffing. Once you're done with block polishing using wet and dry paper. Move onto polishing with cotton cloth buffing wheels attached to a grinder or bench mounted unit. We used spiral sewn buffing wheels on the Bianchi X4. You'll need to repeatedly use a buffing compound on the buffing wheel.
Make sure you follow correct safety procedures here when polishing using buffing wheels. The last thing you want is something like a steerer tube on a fork, flying back and hitting you in the face!
Due care is also required when using buffing wheels, as it's very easy to damage all the previous polishing work with one quick hit from a metal surface of the tool you're using. You'll then have to go back and remove whatever scratch or ding you've just inflicted on the piece.
Keep the buffing wheel clean with a “wheel rake”. We used four and eight inch cotton buffing wheels and began with a black compound, which is an aggressive buffing compound and will do most of the work. We needed the larger diameter wheel to get inside the fork to do the underside of the fork crown. On vintage steel bicycles there are many varied and hard to get to surfaces, requiring the use of hand held buffing wheels attached to grinders, bench mounted units won't cover every angle. Caution here with safety procedures as well as avoiding damaging your work with the grinder itself! Only apply the compound to the wheel briefly, you do not have to cake this on, it's better to apply in small amounts more frequently. Working your way up to less aggressive buffing compounds and softer buffing wheels. Make sure you clean the wheel before changing to a new compound.
If you've never completed polishing in preparation for plating, or you don't have someone who can teach you. Then the best recommendation would be to find a work piece that you can experiment and practice on first.
Remember your job will only be as good as your success achieved with polishing.
Once you've got a mirror finish, you'll be able to take your work to your plating firm and let them complete the job.
When you've dropped off your work at the electro platers, they will coat the job first with a thin veil coat of copper which serves the purpose of filling any small blemishes in the parent metal. The secondary deposits will be nickel over the copper, this forms a corrosive resistant layer. The third part of the process is a veil coat of chrome to colour the copper and give the work the brilliant shiny finish. Each of these steps is completed with meticulous cleaning and polishing processes.
Mark Silich from Finishing Touch, a pro electro plating firm says this about caring for your finished chrome parts, “use windex for cleaning, any kind of wax will scratch the part, once you scratch chrome you can’t buff it out.”
Now you know why some bicycle restoration projects side step the work of re-plating by just painting the entire frame. For anyone game enough to take this on, you can always pay someone like Joe to do the work, find a local plater, or do some of the work yourself. I hope this helps determine which is the best fit for your plated bicycle frame restoration project and helps with a smooth liaison with your frame painter or electro plating firm.
Below are step by step instructions included with photographs and videos of the work that Joe Cosgrove and myself completed on the Bianchi X4. It's well worth watching the video from Finishing Touch Inc, to see how the pro's deliver a superior result.
The History of Bicycle Electro Plating
More Related Bianchi bike stories

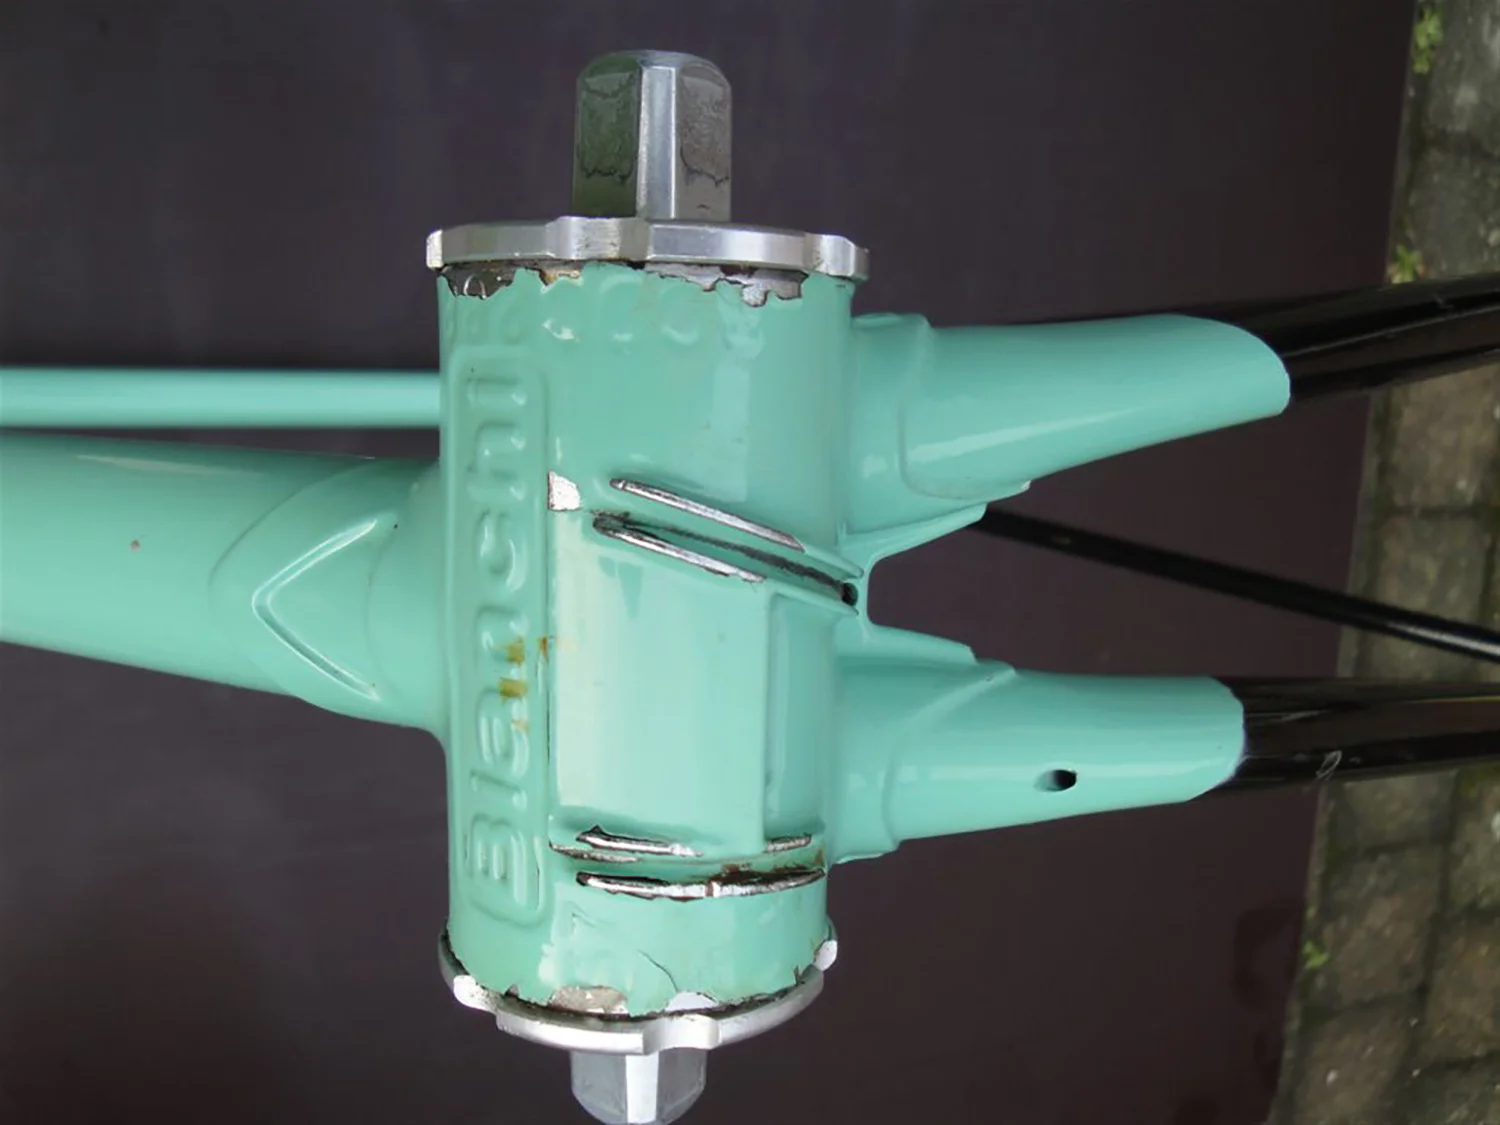

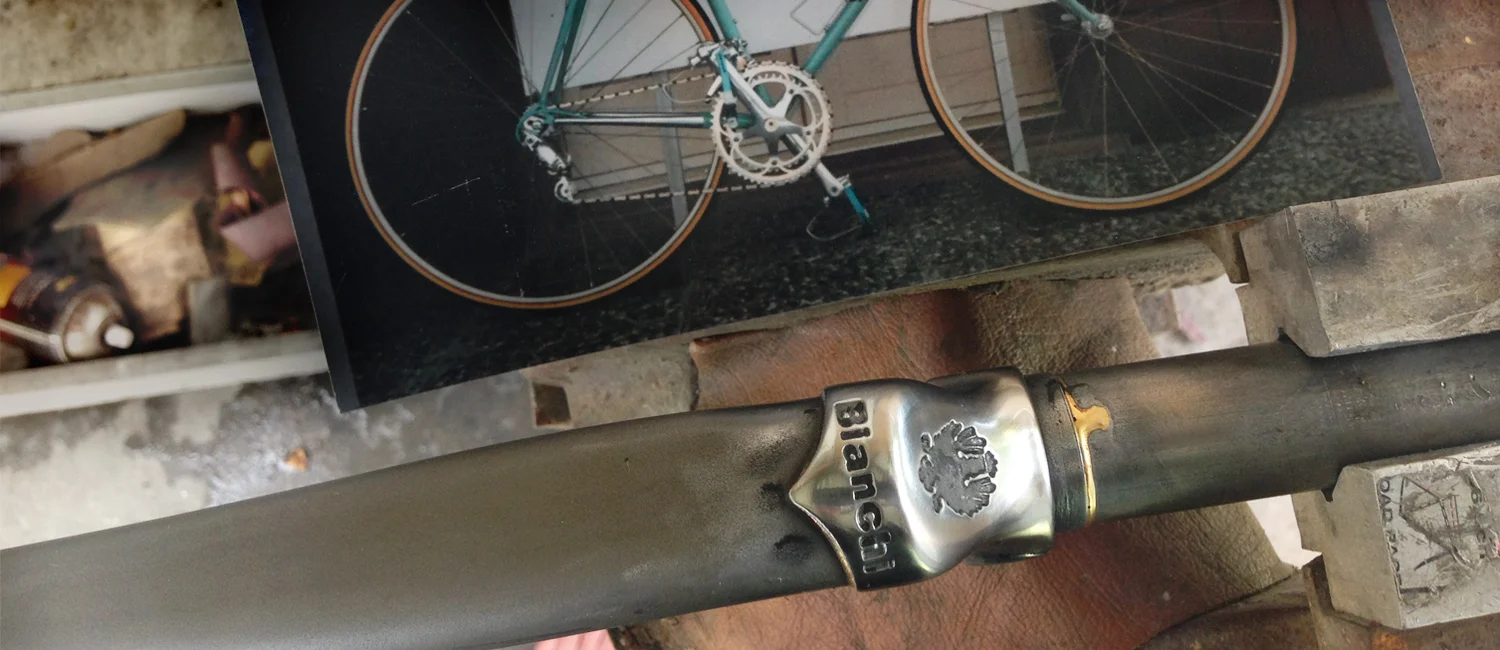


The fork crown after it was chemically stripped of paint and before it was sent to the electro plating firm for complete removal of the old triple chrome plating.
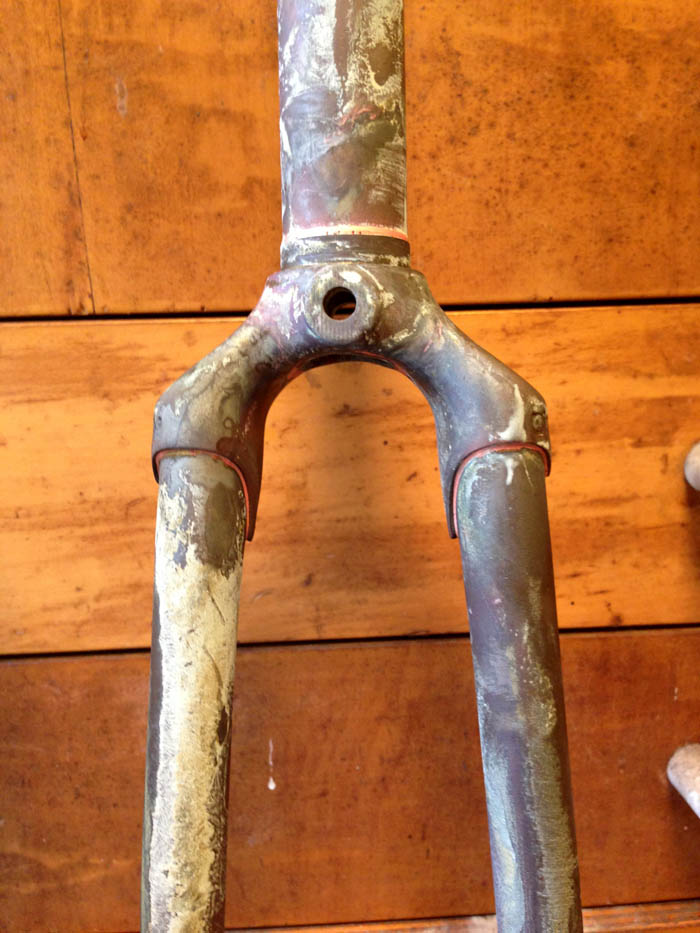
Once you get your frame back from the electro plater and it's had all of the original plating removed, it should look something like this.
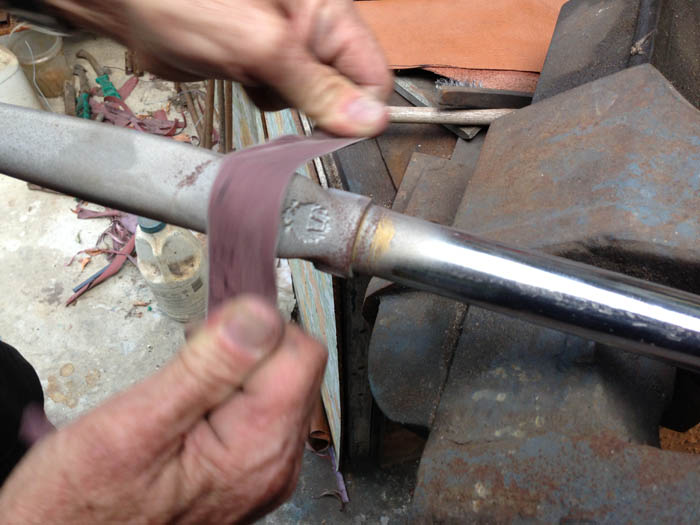
Begin polishing with a coarse wet and dry cloth, about 80 or 120.

You should begin to see immediate results, a long way to go though.
You can see in the video that Joe is using a piece of dowel and a file as a "block" behind the 80 grit paper. The blocks fit the intended profile of the work.

Keep working away with a coarse grit and work your way up to say a 1,200 wet and dry paper.

bianchi x4 frame polishing

We haven't got anywhere near using 1,200 wet and dry, but you can see the subtle change.
Here Joe explains the finer points of polishing using wet and dry paper.
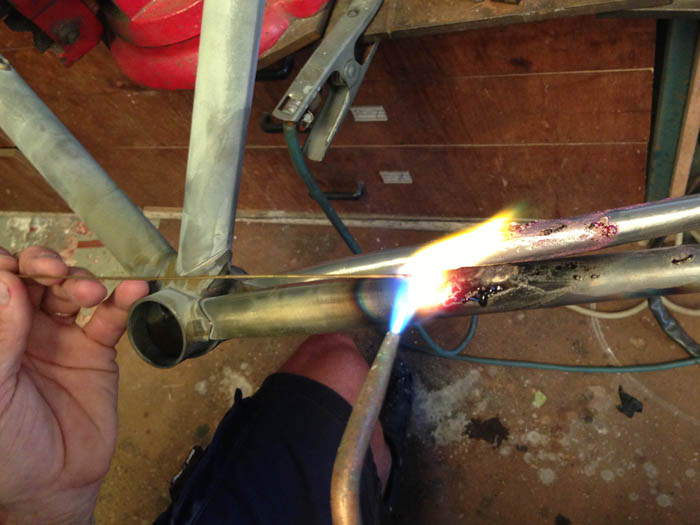
A step you should definitely try to avoid. Bronze brazing pitted areas of the chain stays after they were left too long in the bath while removing the original plating. We did get a mirror, triple plated finish in then end though!

After the bronze brazing fill we used a file to carefully level the surface, retaining the profile of the TSX Columbus chain stays. Then slowly worked our way up from 80 wet and dry paper, as described for the fork crown above.
Polishing with cloth buffing wheels and buffing compound.

Joe has his own methods from years of experience. Be very careful not to damage yourself or the piece that you are working on. Those metal parts of the grinder can damage your frame in the blink of an eye. If in doubt practice first before attempting to work on your special vintage bicycle.

We wanted to achieve a perfect result, even though the Bianchi X4 fork crown looks nice and shiny, we took it further.

This is the end result which we took to the plating firm, for chrome plating our Bianchi X4.

Bianchi X4 fork crown, ready for chrome plating after many hours hard graft polishing the parent metal.
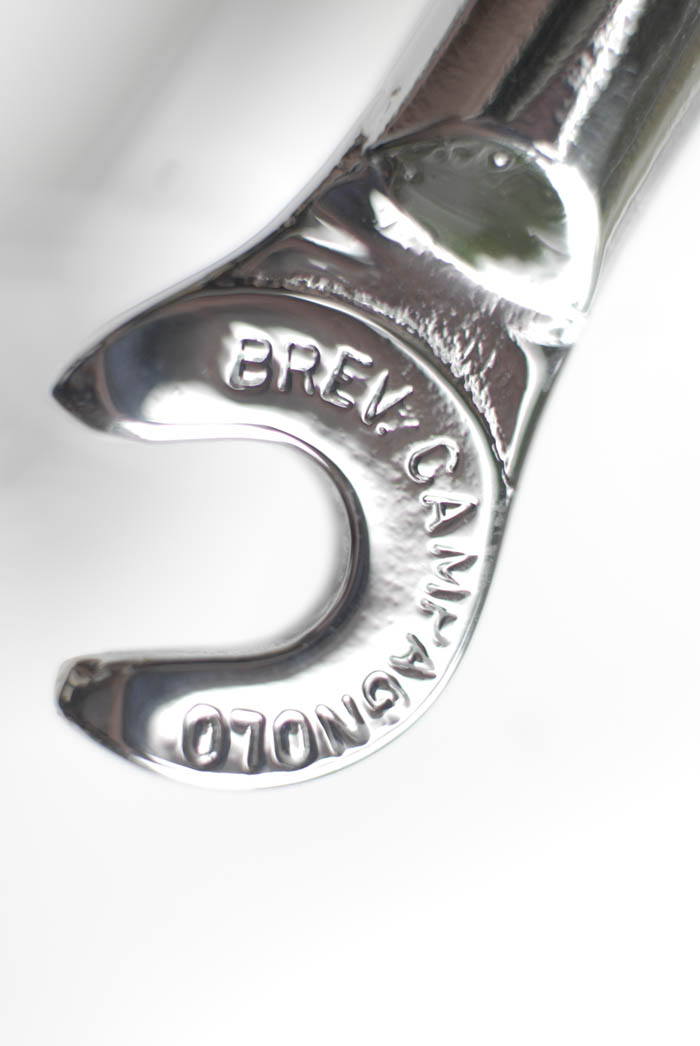
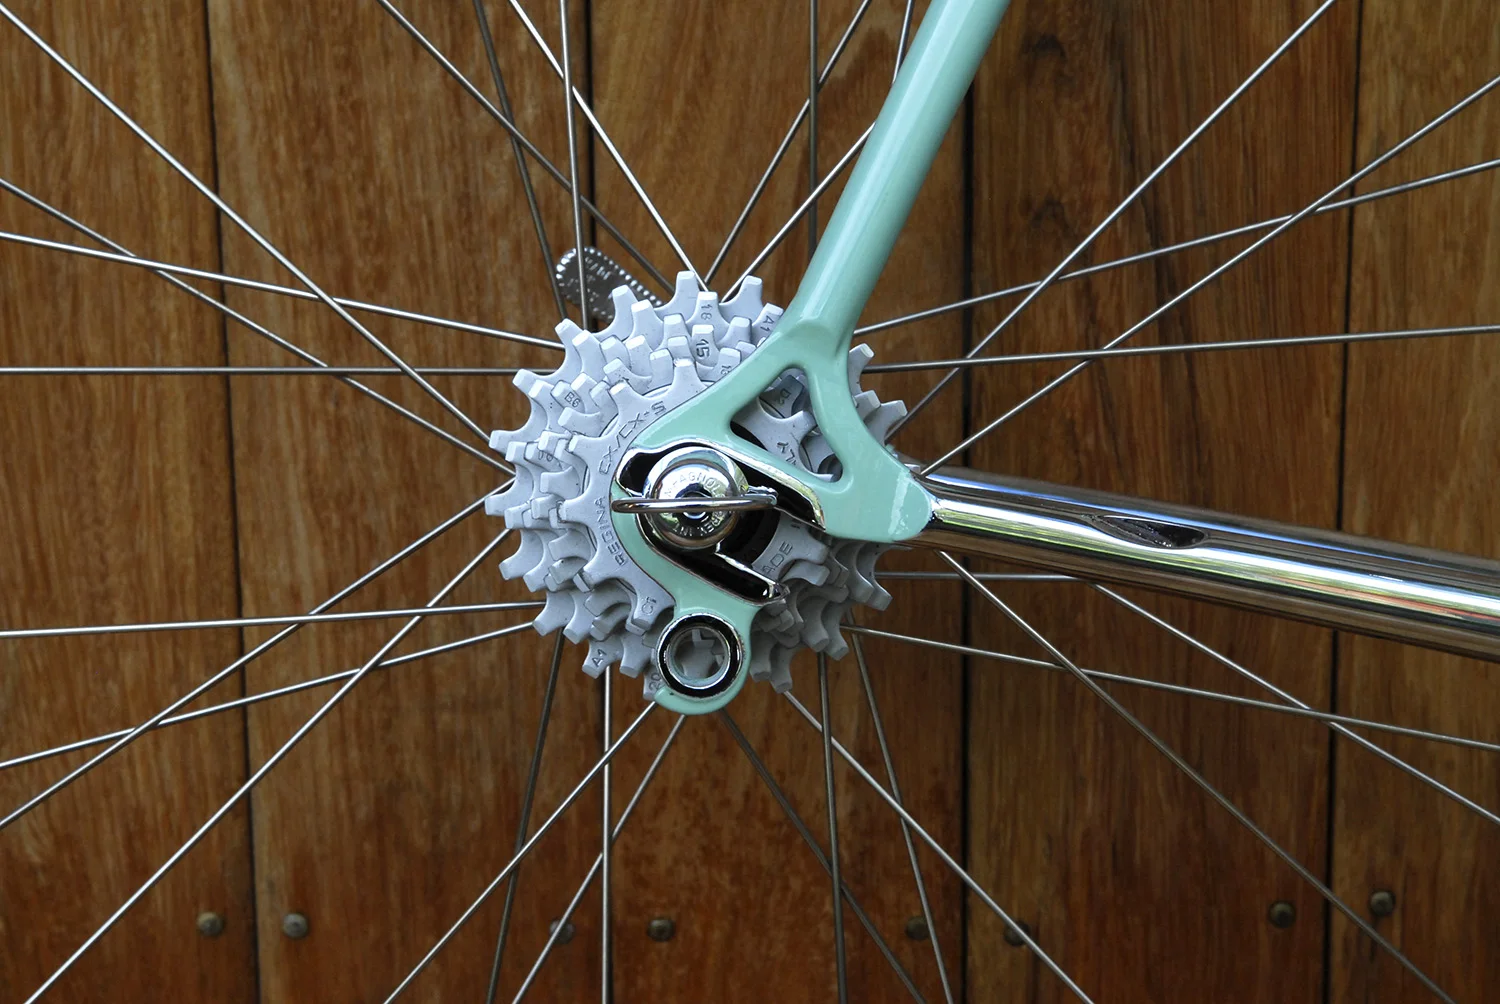
Bianchi X4 fork with Campagnolo dropouts. The final result of triple chrome plating.
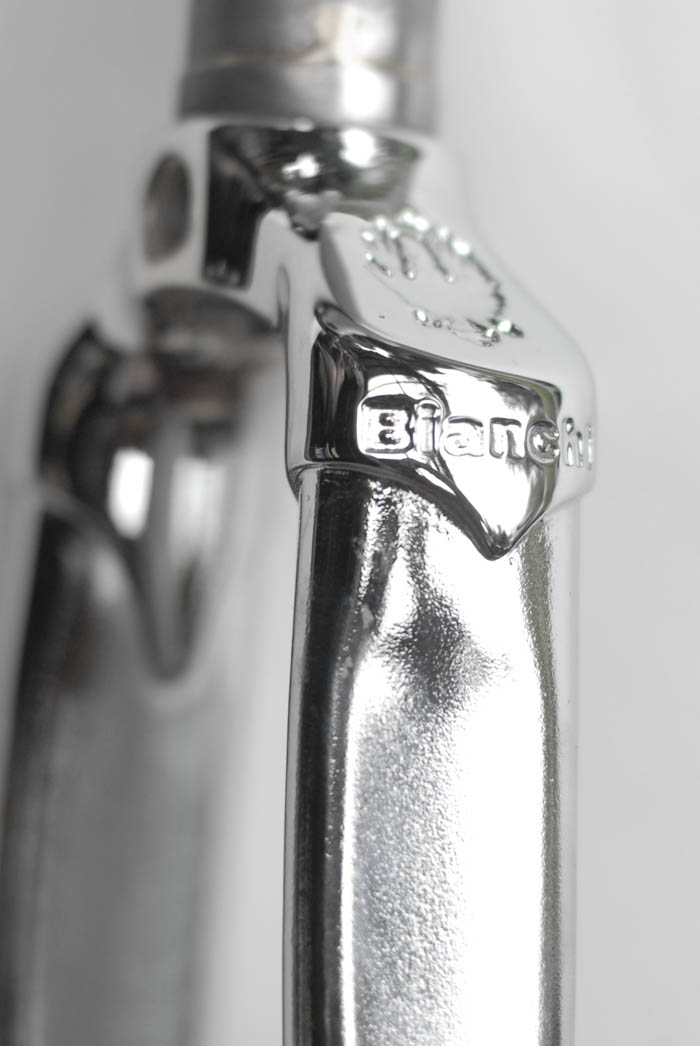
The Bianchi X4 fork crown after triple chrome electro plating was completed. I preferred the natural polished metal look though!
The story of an almost new 1988 Bianchi x4, ridden only a few km's. Winner of Road Bike Of The Year at Pushies Galore 2015.